

ER Diagrams are available in Mermaid Graphical Editor as of version 0.4.1. (released on 2024/08/25).
In this post, we’ll guide you through how to create ER diagrams using the Mermaid Graphical Editor, a tool developed by one of our Astah developers.
Table of Contents:
- Why Use Mermaid Graphical Editor for ER Diagrams
- How to get started
- How to create ER Diagrams
- Advanced ER Diagramming with Astah Professional
Why Use Mermaid Graphical Editor for ER Diagrams
GUI is better for Creating Relationships Between Entities
While Mermaid.js allows you to create ER diagrams with just a few lines of text, working with relationships between entities is often easier using a graphical interface. Mermaid Graphical Editor offers a GUI that simplifies the process, making it more intuitive and less prone to errors, similar to general drawing tools.
Easy to edit, Share and Update Within One App
As you may know, GitHub officially supports Mermaid – Mermaid code blocks are rendered and displayed as diagrams. Data definitions like ER diagrams are crucial during design discussions, and having diagrams directly embedded in README.md files or issue summaries can be a significant advantage.

Using typical drawing tools for ER diagrams means exporting them as image files and pasting them into GitHub. When updates are needed, you must track down the original files, modify them, and export the new images. However, with Mermaid Graphical Editor especially with Chrome extension, you can easily update diagrams within the browser, then seamlessly copy and paste the updated code into GitHub, all without switching tools.

How to get started:
On Visual Studio Code:
- Download the “Mermaid Graphical Editor” extension for Visual Studio Code.
- Open an existing .md files or create a new one.
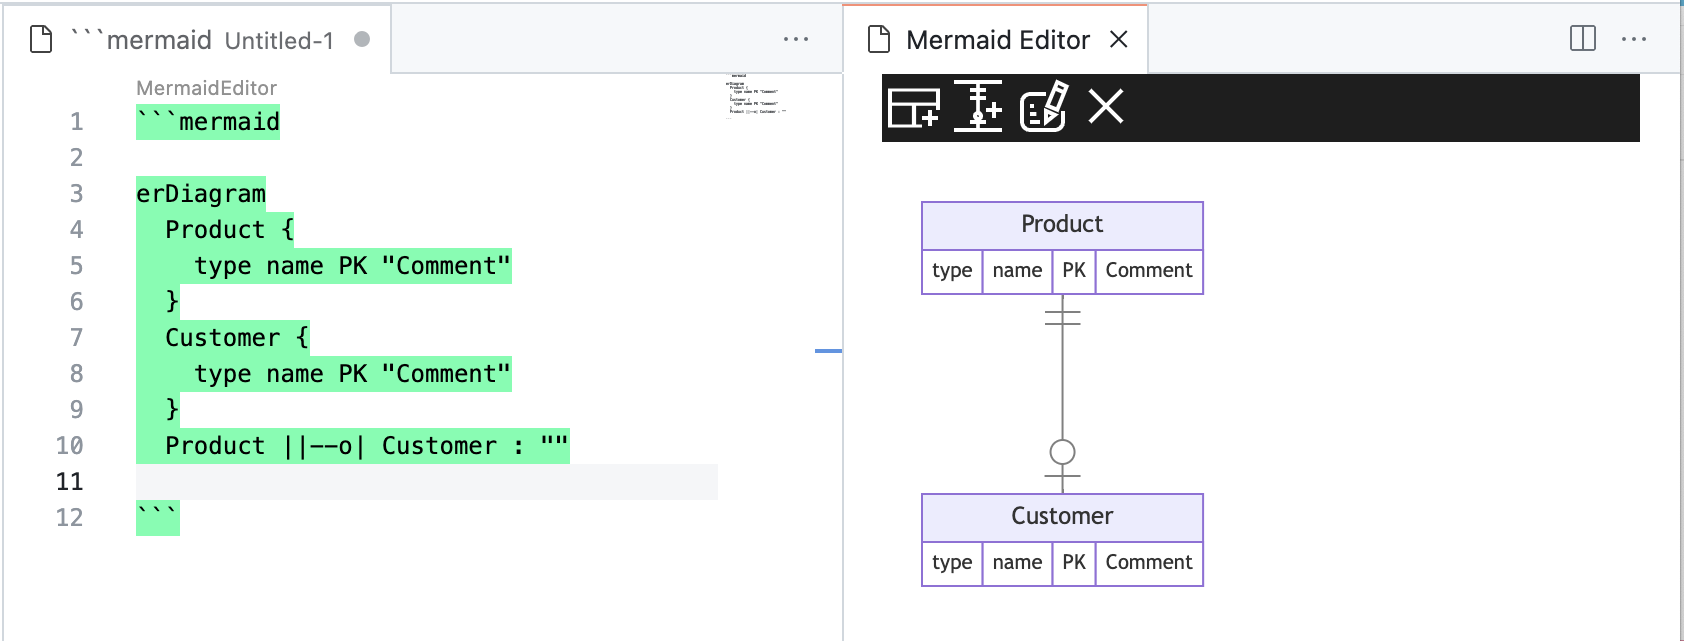
- When you type a Mermaid code block (
```mermaid), the “MermaidEditor” menu automatically appears at the top of the editor. - Click the “MermaidEditor” to open the diagram editor in the right pane, then select “ER Diagram”.
- From the top toolbar, select stencils and start creating your diagrams – just like using any other drawing tool! Ths code is generated automatically as you work.
On Chrome:
- Install the “Mermaid Graphical Editor” extension for Google Chrome.
- Click the Mermaid Editor icon in the tool bar to open the editor window.
- Choose ER Diagram.
- Select stencils from the top and start creating your diagrams graphically, with the code generated in real-time.
How to create ER Diagrams:
1-Minute Demo Clip:
Creating Entities:
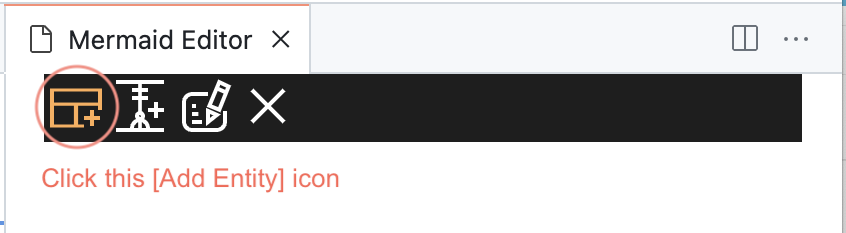
- Click the [Add Entity] icon.
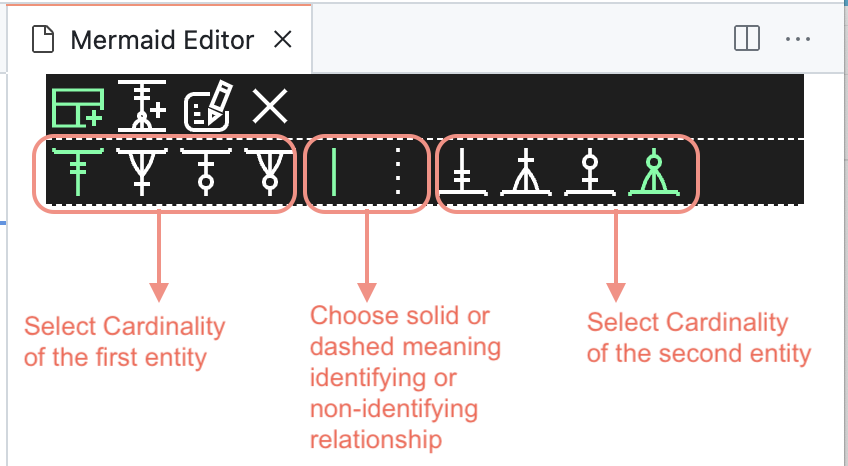
- A second row appears where you can specify the Relationship types to be between Entities you are going to make. You can change this later after each relationship is created. So you don’t have to worry too much at this point.
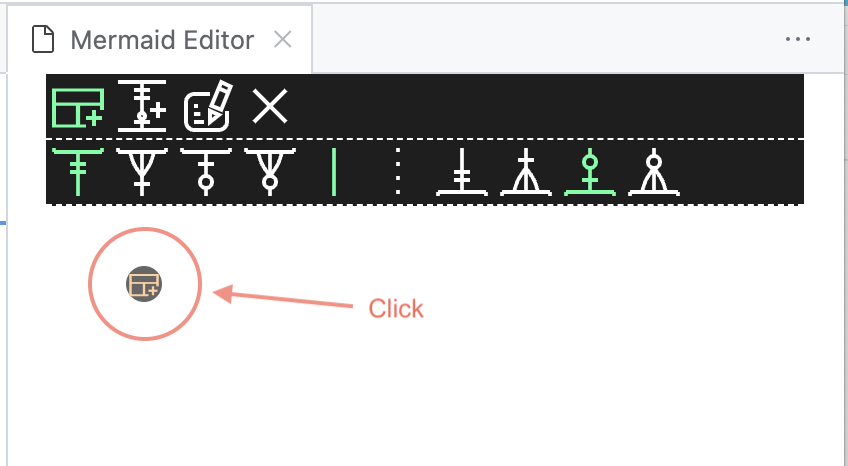
- Click this button.
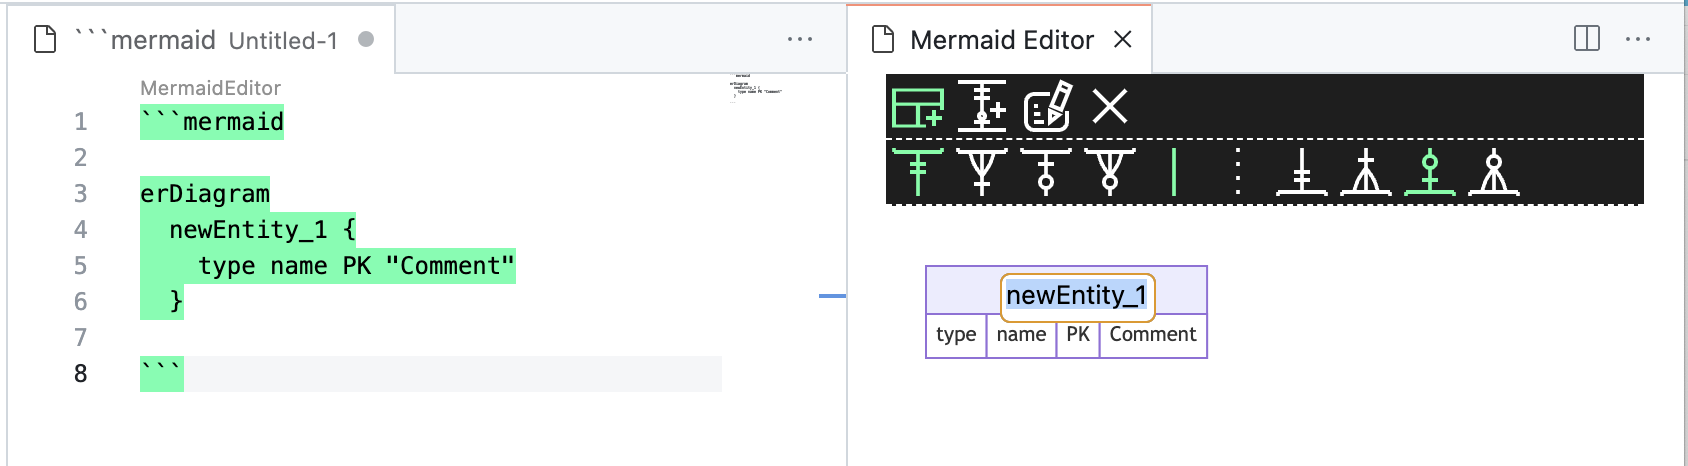
- Now an Entity is created and the code is updated on the text area. You can directly name the Entity on the diagram or type in the text area.
- To create more Entities, click the [Add Entity] icon on the canvas.
Clicking ones that are attached to an existing Entity, it creates a new Entity that is automatically connected via specified Relationship type.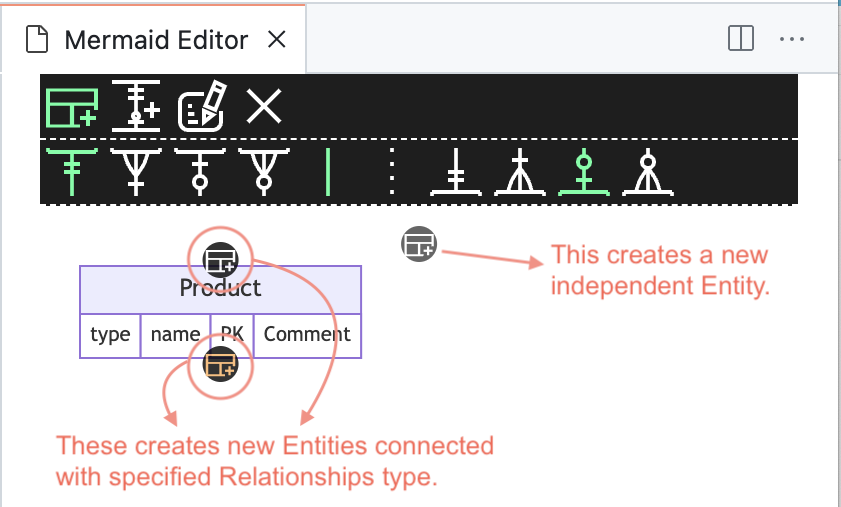
- A new Entity is created.
Edit Entity Attributes:
Once you create an Entity, it has default attributes as below: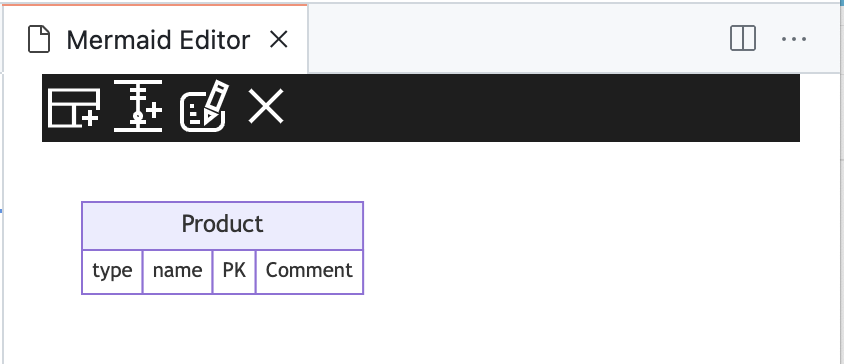
You can directly double-click to edit each value:
Or you can edit these attributes once by following these steps:
- Click the “Edit” button on the tool bar

- Click the button on the far right.
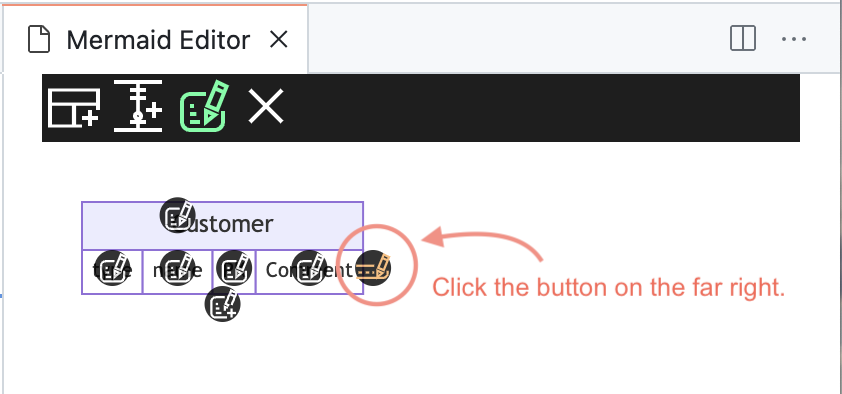
- This allows you directly edit all the attributes once.

Relationships
Creating Relationships
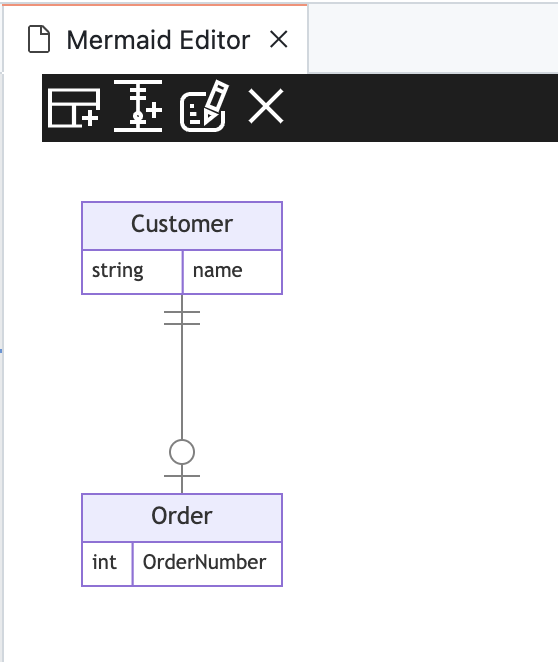
You can create relationships between Entities as you create Entities as shown at “Create Entities“.
If you want to create Relationships between Entities, you can do so by:
- Click [Relationship] button on the tool bar.
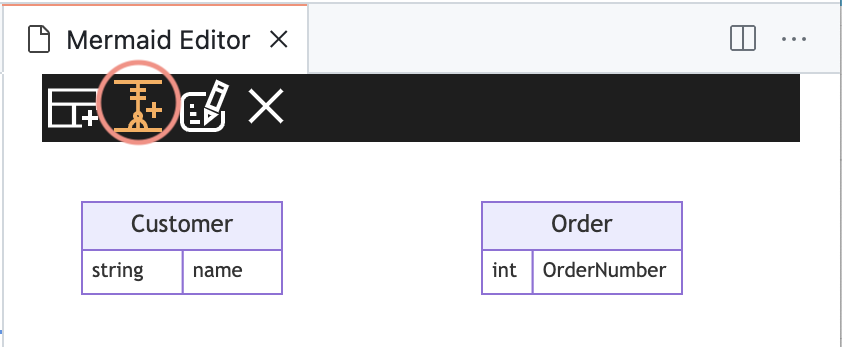
- Select Relationship type on the second row.
GUIDE: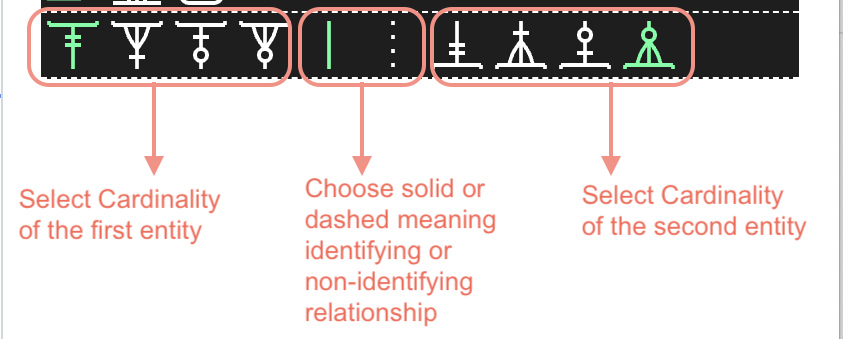
- Click the “Add Relationship” icon on the first Entity.
- Click the “Add Relationship” icon on the second Entity.
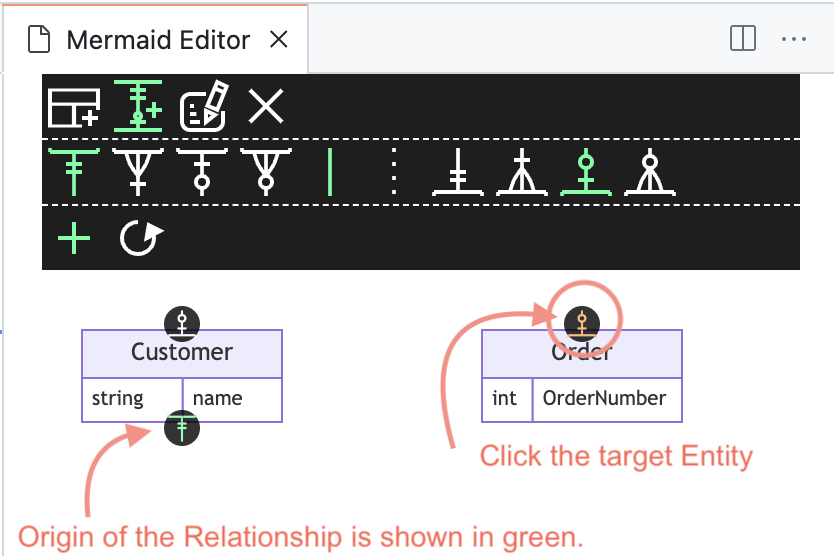
- Relationship is created.
Adding Relationship Names
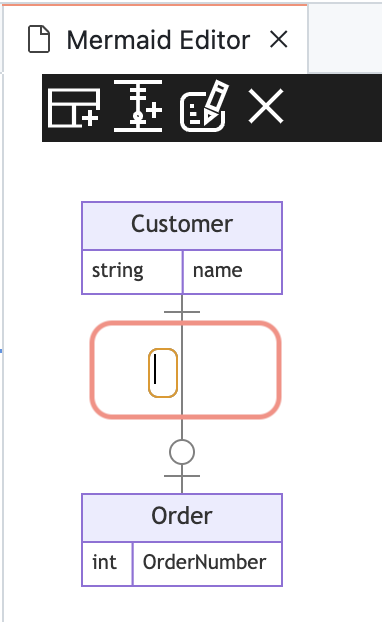
- Click on a Relationship line and click [Edit] icon.

- You can directly type the relationship name.
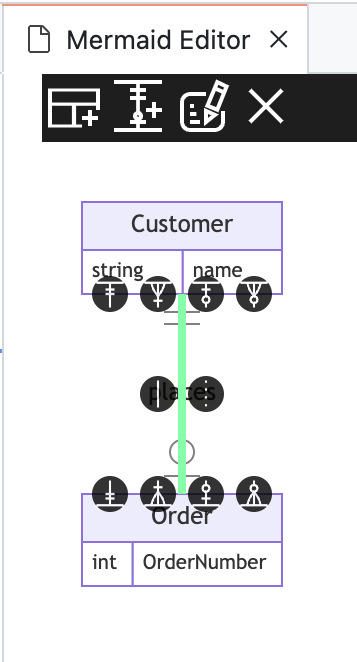
Edit Relationship types
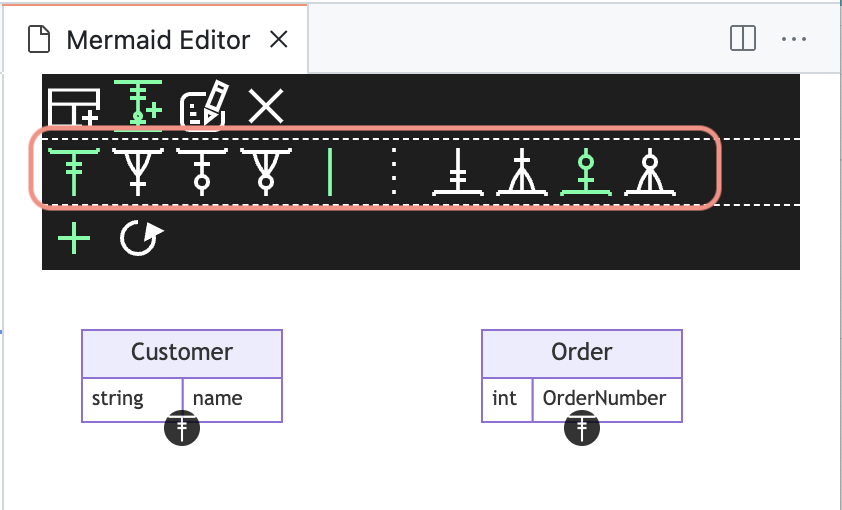
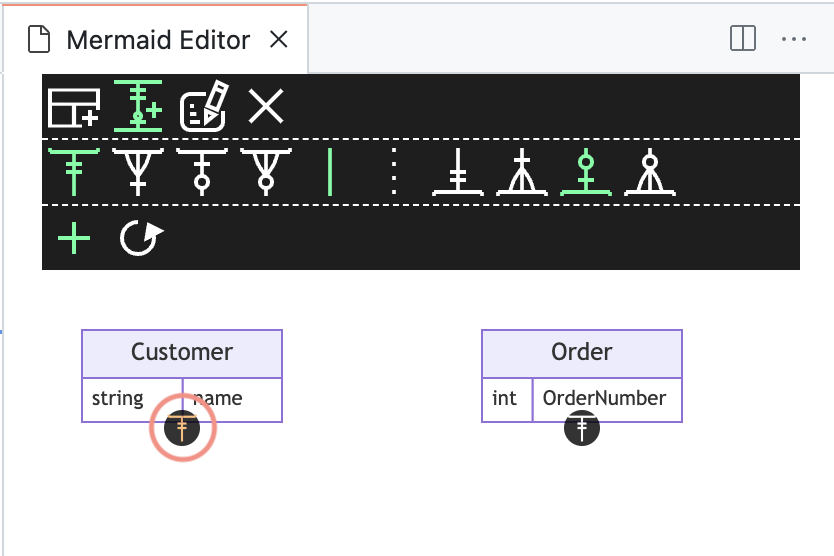
You can change the relationship type that is already created by following step below:
- Click on a Relationship line and click [Rotate] icon.
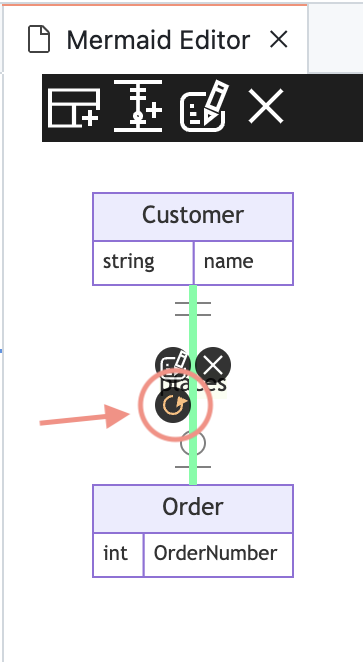
- Click the relationship type (cardinality and identification)
If You’re Looking for More ER Diagram Tools,
Try Astah Professional
If you are interested in exploring other ER diagramming tools, try Astah Professional.
With Astah Professional, you can create ERD (Entity-relationship diagrams) from scratch or auto-generate ER diagrams by importing tables from an existing database..etc..
Available functionalities:
- SQL Export
- Reverse Engineering
- Crow’s Foot & IDEF1X
- Import ER models via Excel
- Export ER models to Excel
- Crow’s Foot & IDEF1X notations
- Logical and Physical Models
- Highlight relationships… and more!

You can try out Astah Professional for 20 days for free.

One thought on “Mermaid Graphical Editor : ER Diagram”