

Recently, we’ve received the same inquiry from several users about how to share template file with others. Mostly from academia and a few from software development companies.
For instance, one customer is an instructor who teaches software design patterns through e-learning course in Taiwan (水球軟體學院 : Check them out if interested). In his course, he is using Astah Professional and giving his students UML Class diagrams’ assignments. What he wanted was to have Astah to include a Java library in its project file, so that his students can model using a set of predefined classes.
Another is a professor of computer science who is currently developing a security-engineering process by extending UML diagrams. So he needed to use a profile for this specific-domain in the tool and share it with his colleagues.
I already answered to their inquiries individually but thought I should write a blog post about it hoping it’s helpful for other Astah users who may be in the similar situation.
So I will guide you through how to share a “template file”, which contains all the predefined models you need, with others to execute modeling more effectively and maintainable without creating inconsistencies as a whole.
1. Prepare Templates
First, you need to create a “template” – an independent project file you put all the models and set of predefined stereotypes you need for a particular use.
Frameworks and Libraries
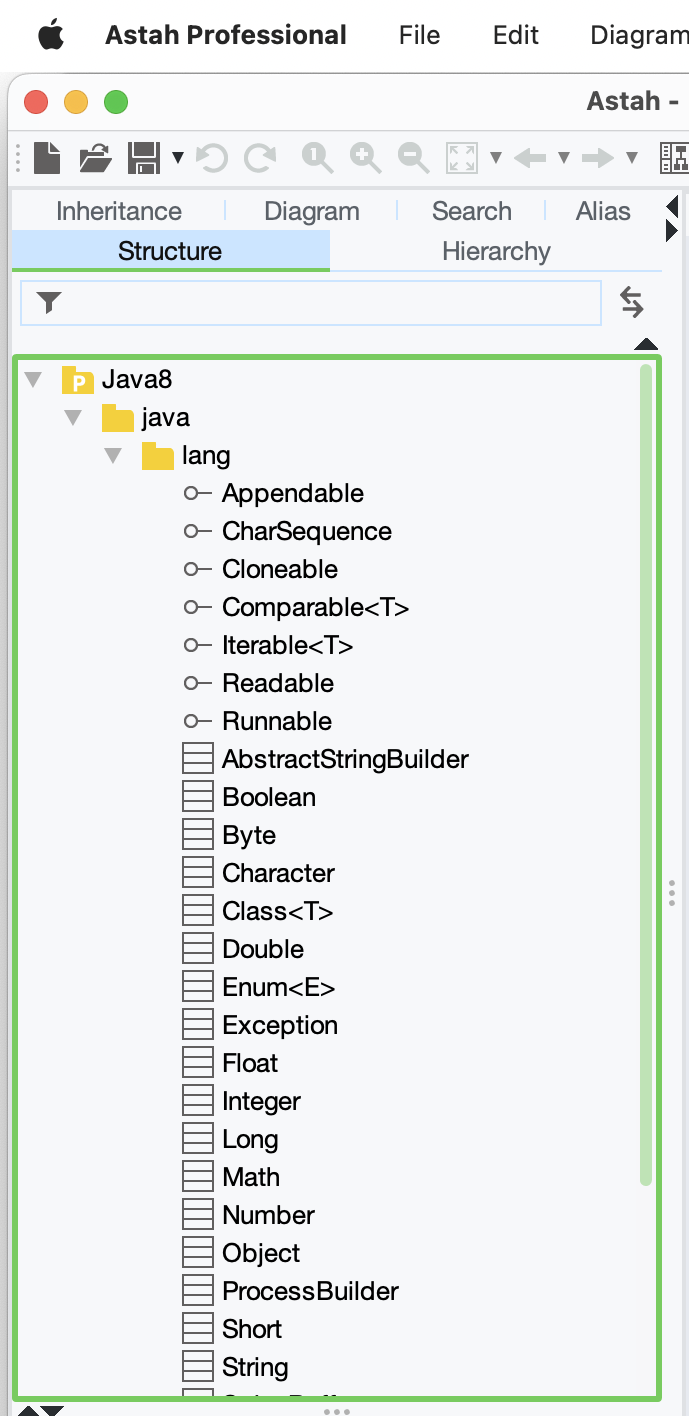
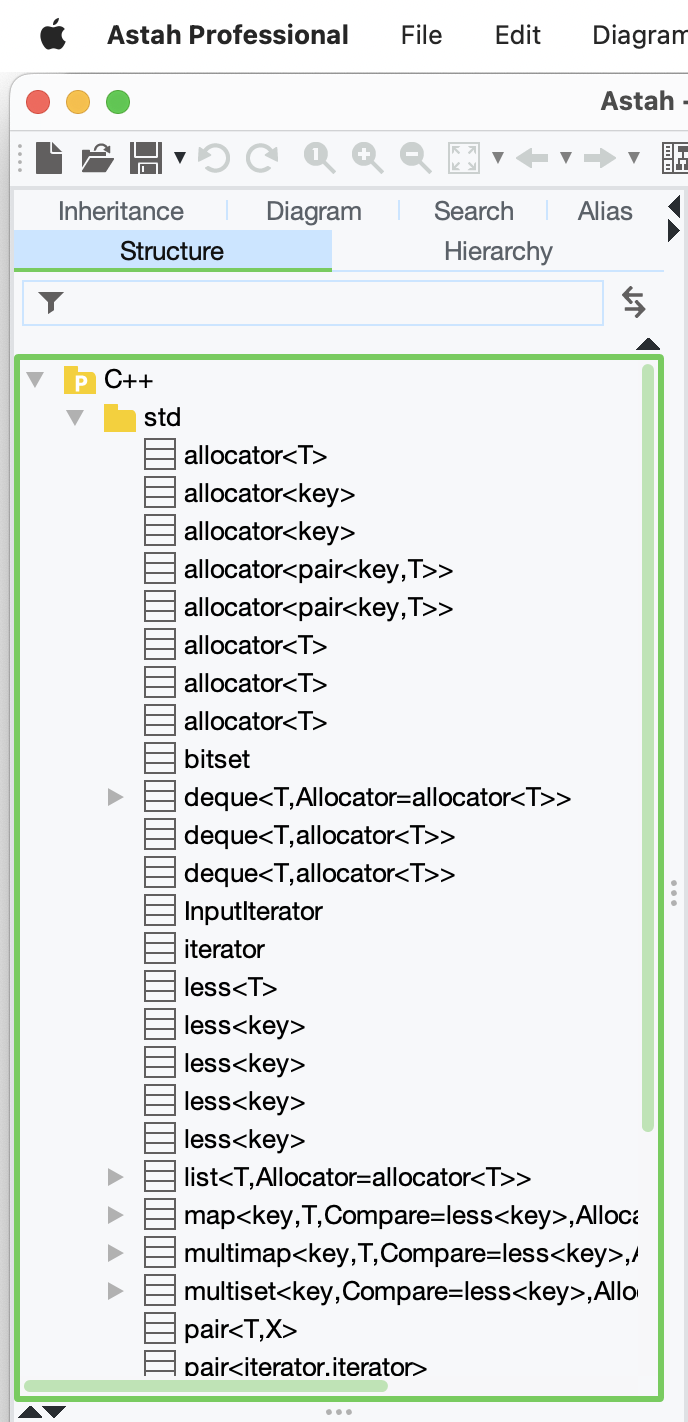
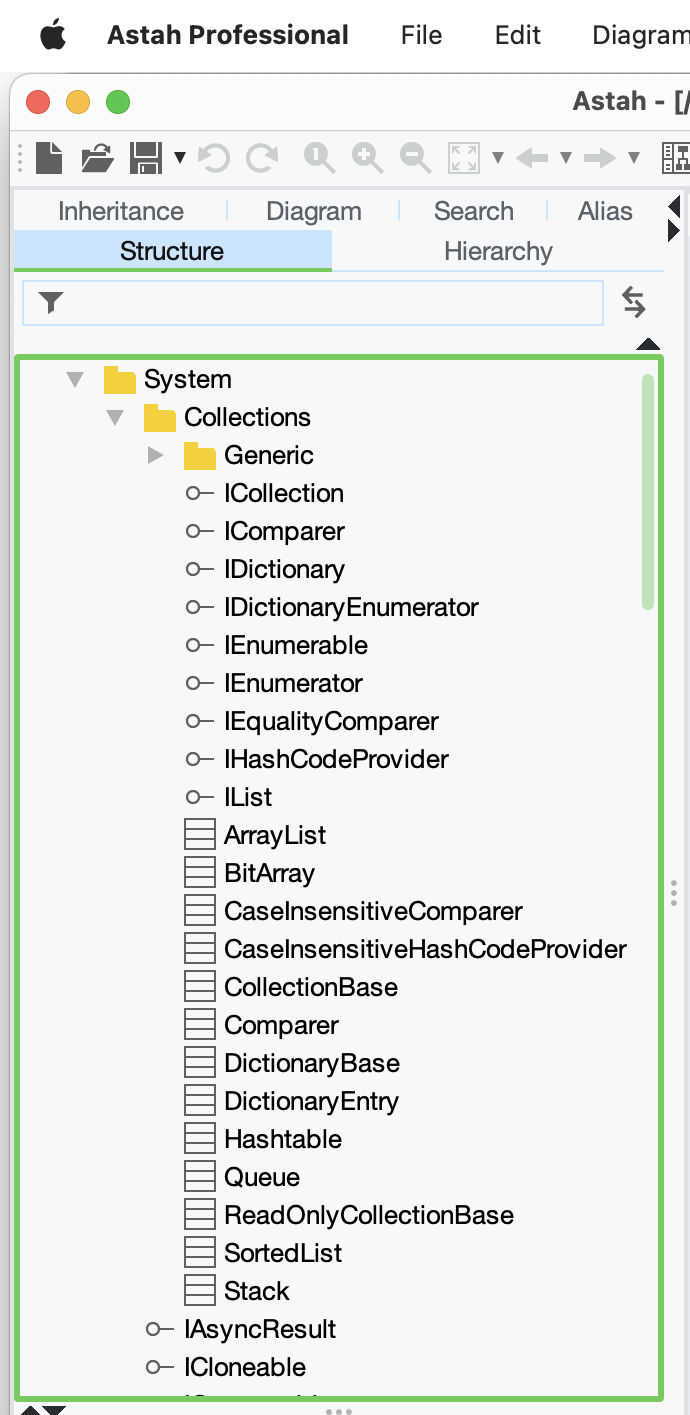
There are many open source frameworks available for developers. So you can import the framework source code into Astah to create a template file.
- Import Java source code or use Easy Code Reverse Plugin
- Import C++ source code
- How to import C# source code
Actually, Astah Professional has several built-in template files in Astah Installation folder\template\project. So you can start from there too.
Custom Stereotypes
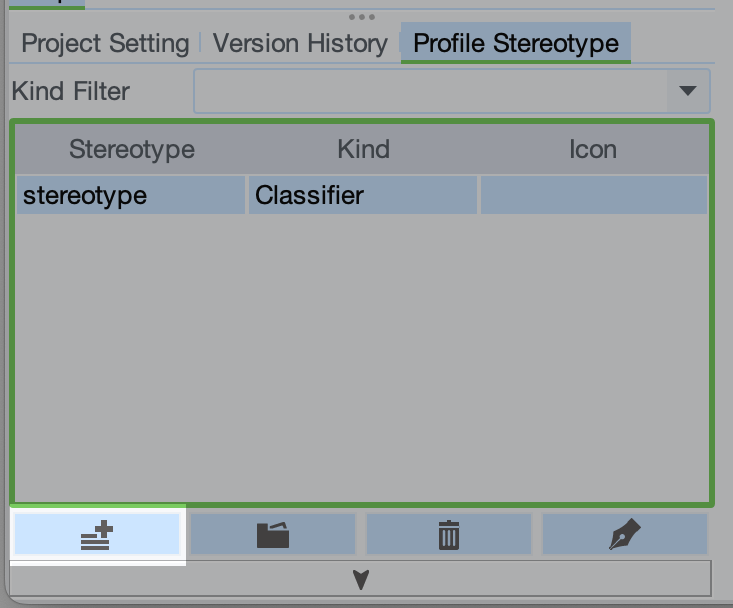
Astah Professional does not currently support Profile imports. However, customizing stereotypes and TaggedValues are available.
First of all, Astah has a set of predefined stereotypes as shown in the figure below and you can add custom stereotypes to the list by following the step below.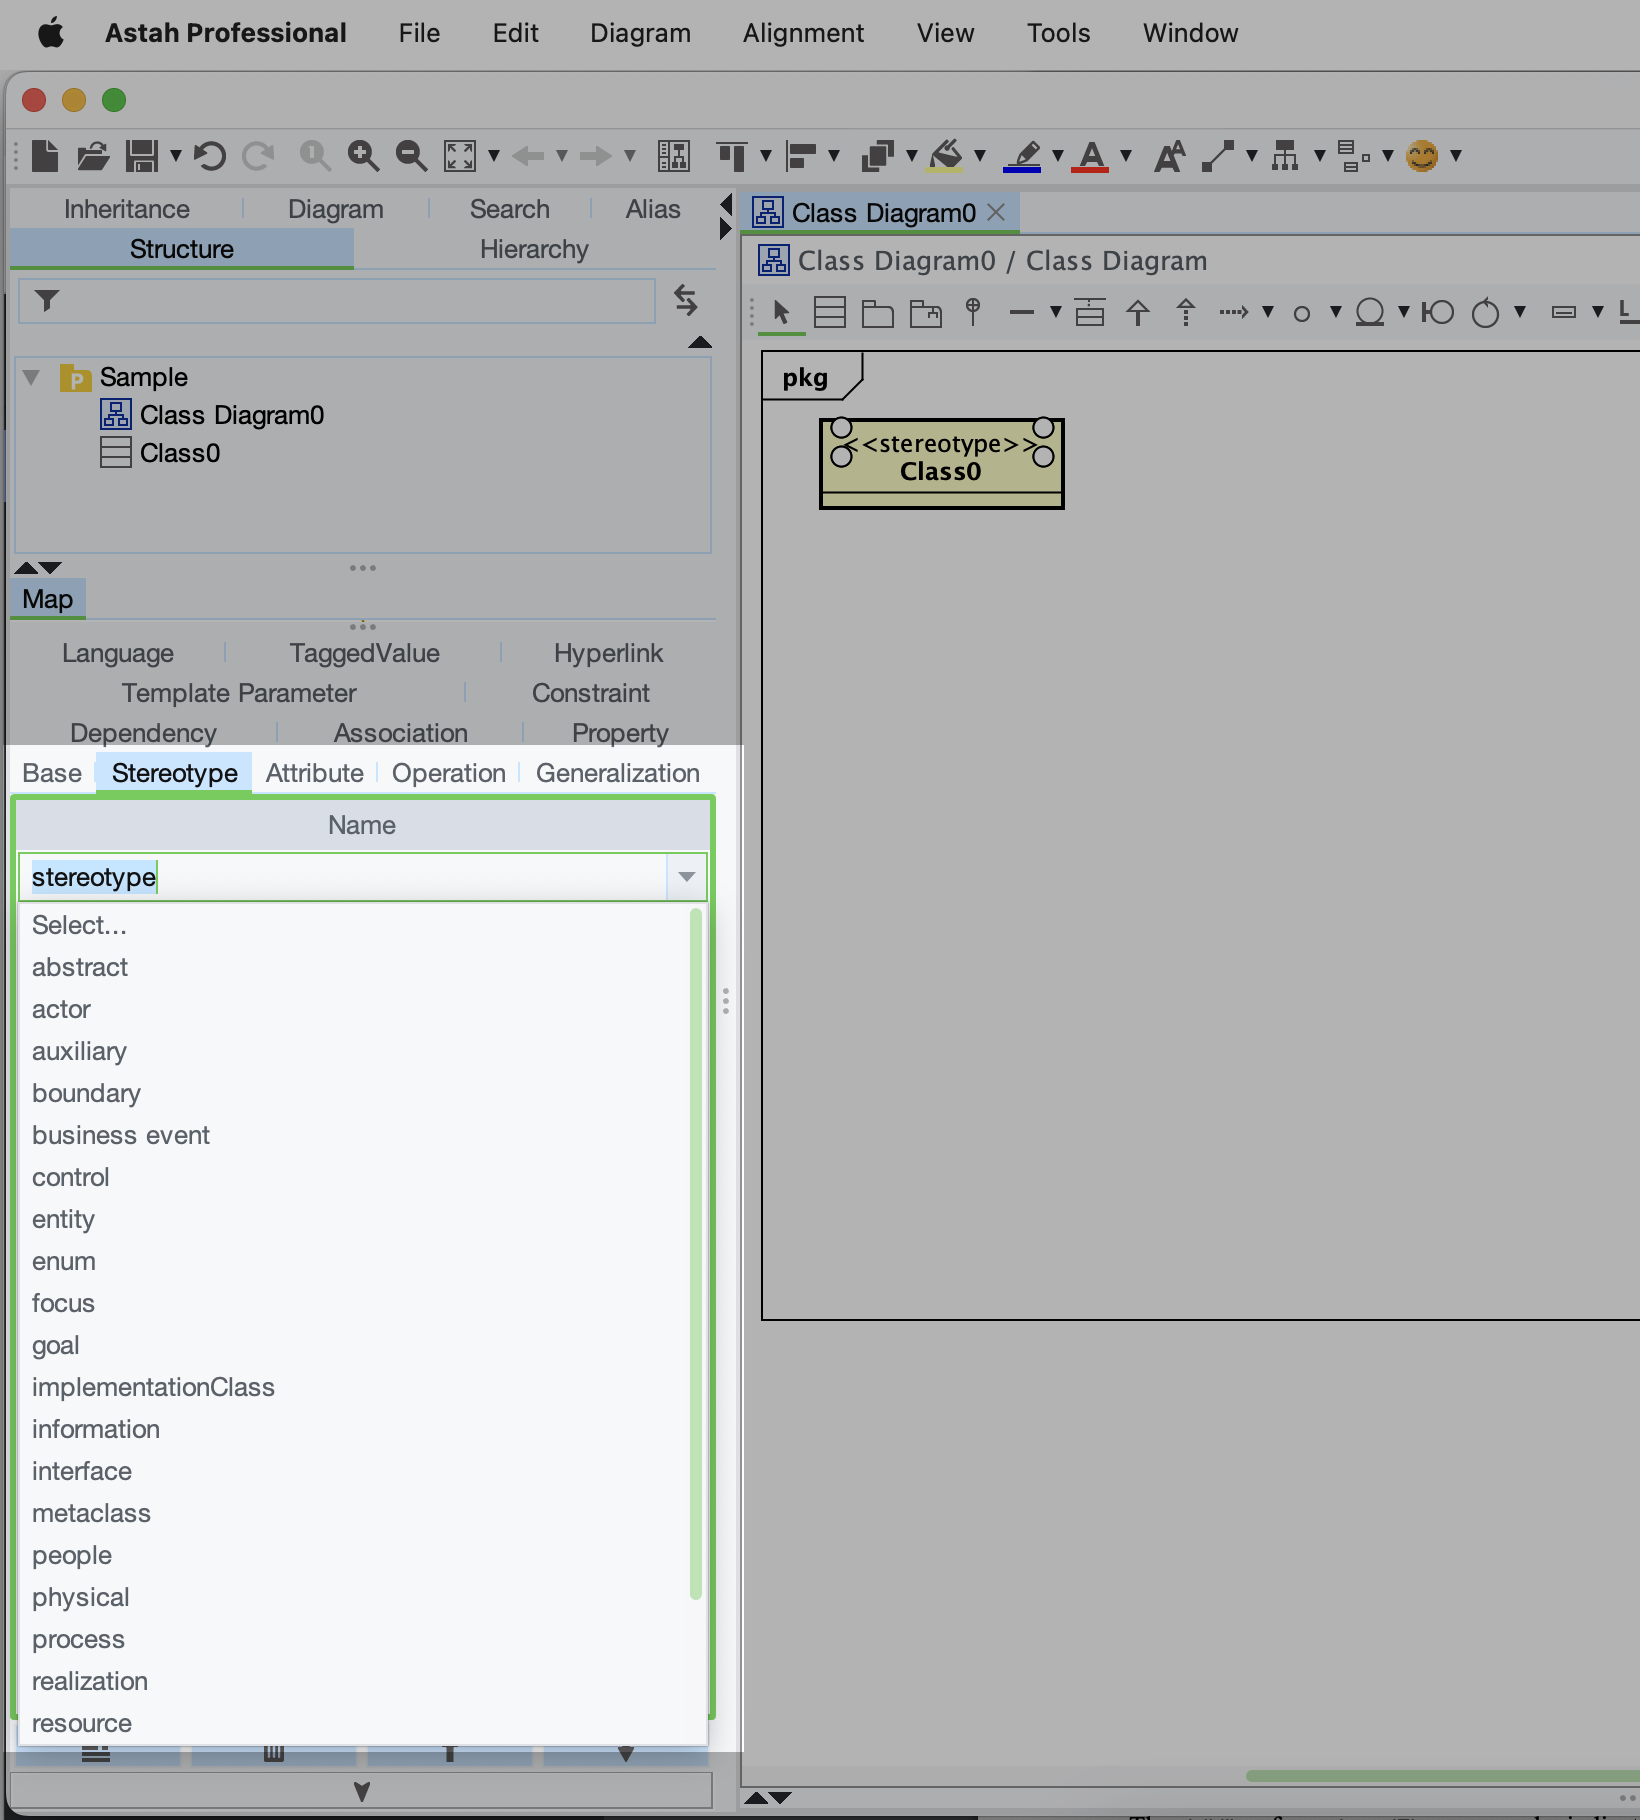
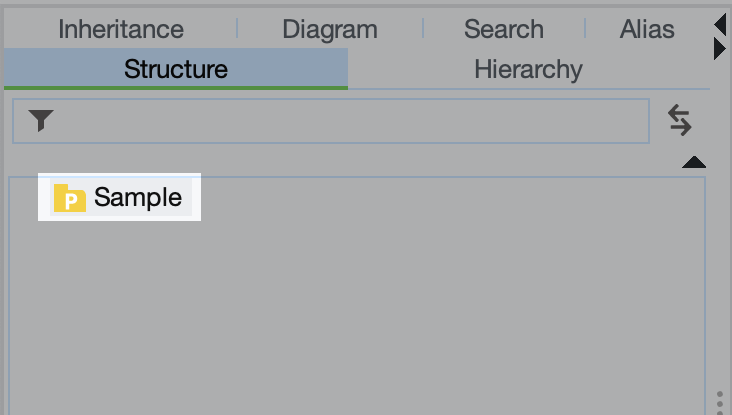
- Select a root package in a structure tree (top-left pane)
- Select [Profile Stereotype] tab in the property view located in the bottom-left.

- Click the left icon which has a plus mark on it to add a new Stereotype.
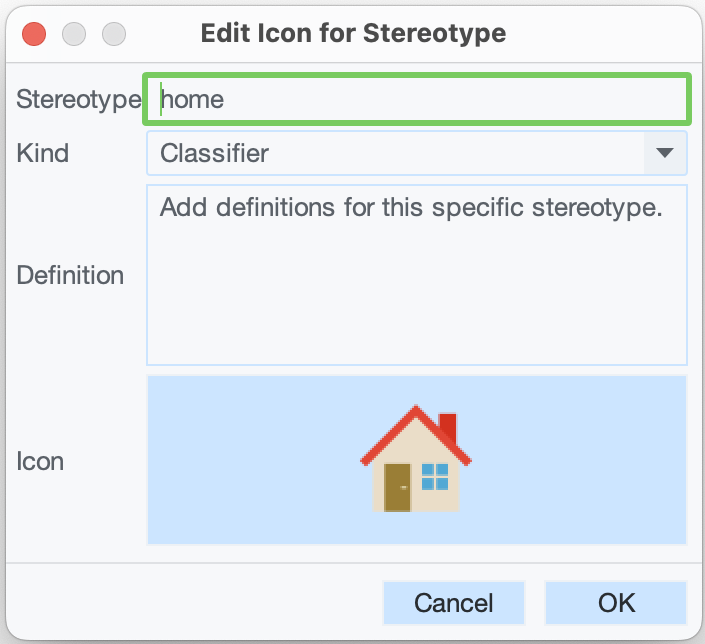
- By clicking the added stereotype in the list, you can open a new window to define the stereotype.

- You can upload an image file to use for an appearance for each stereotyped model element if you’d like.
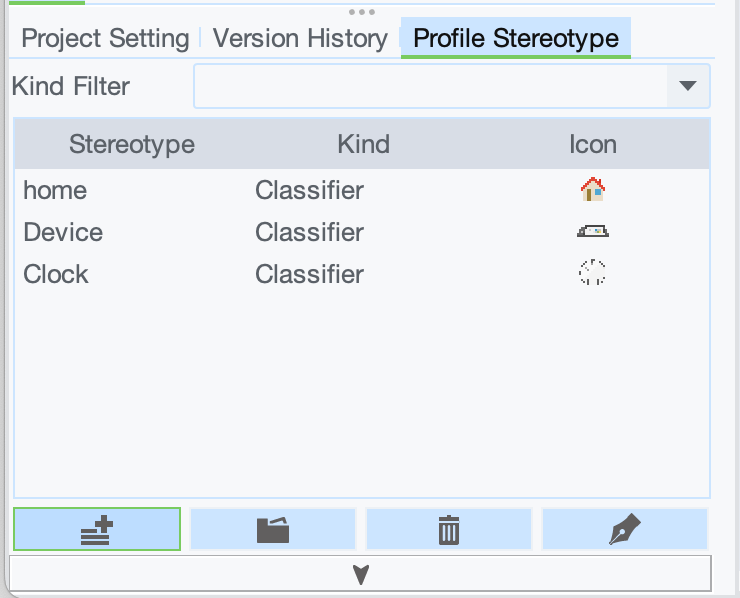
- Add custom stereotypes as many as needed.
TIPS
To change the appearance of stereotyped model element, click the model element and choose [Customize] from the main menu.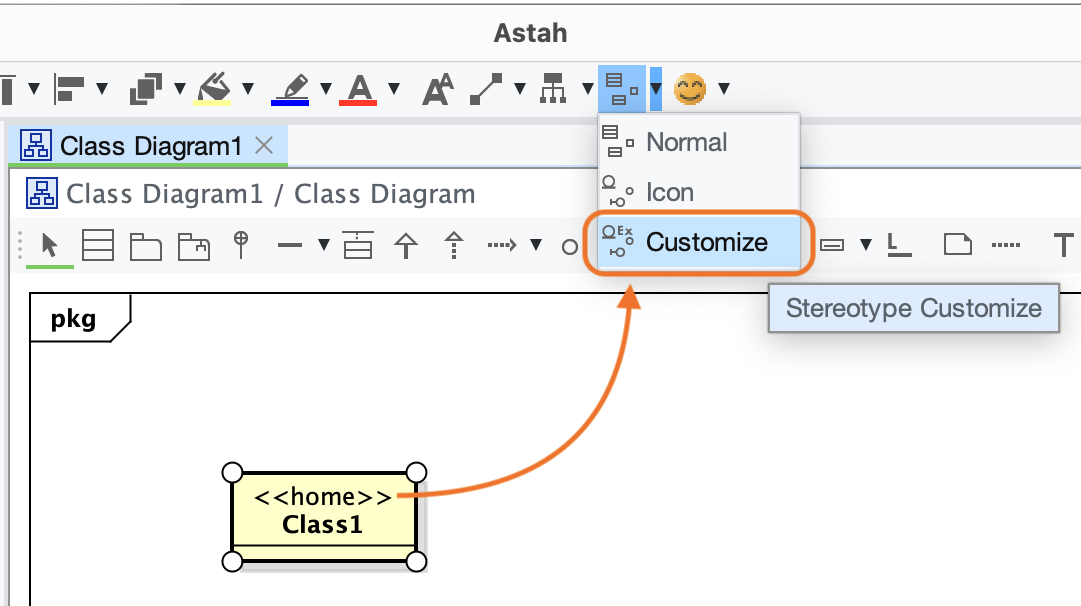
Then the model element will be rendered as the stereotype icon you defined.![]()
* UserTagged Values need to be defined in an external property file.
2. Share Templates with members
Now you have created a template file to share with team.
The way to distribute your template file varies depending on how your team members want to use it.
A: Set as default
Case: You want your team members to open this template every time they create a new file.
How to share template: Simply distribute the template .asta file to each member. Then they will need to save this in a specific folder in their machine.
How to use template: Read below.
- Save this template file in User_Home.astah\professional\template\project (create a “project” folder if it does not exist.)
- Launch Astah, go to [Tools] – [System Properties] – [Project]
- Select [User Template] and choose the template file
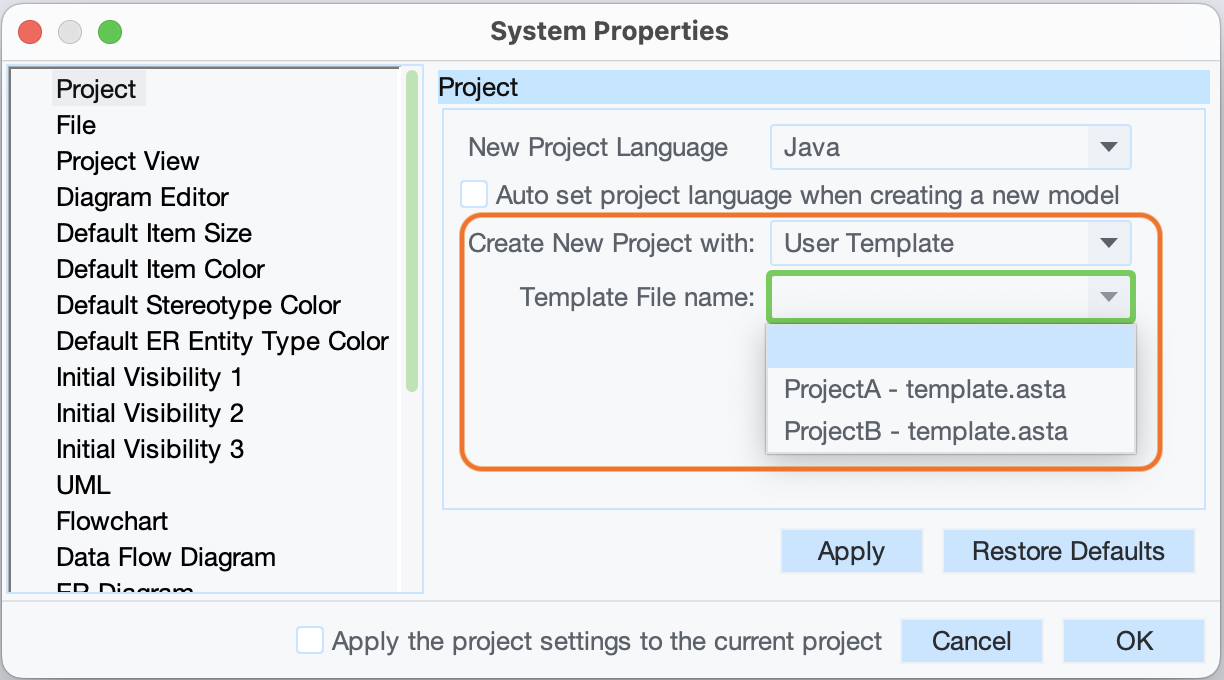
Now every time you create a new file, this template file opens.
B: Import as read-only
If you want everyone to use the exact same models contained in the template but don’t want them to edit, this is the right way. You can import this template file as read-only. So that members can work on their own project by referring and reusing the template models and there is no worry about the template models being accidentally altered.
Case: You want your team members to use this shared template but template models should NOT be altered by them.
How to share template: Ideally, this template .asta file should be stored in one place where your team members can access. So that when this template file is updated, each client will detect the update and can use the up-to-dated template models.
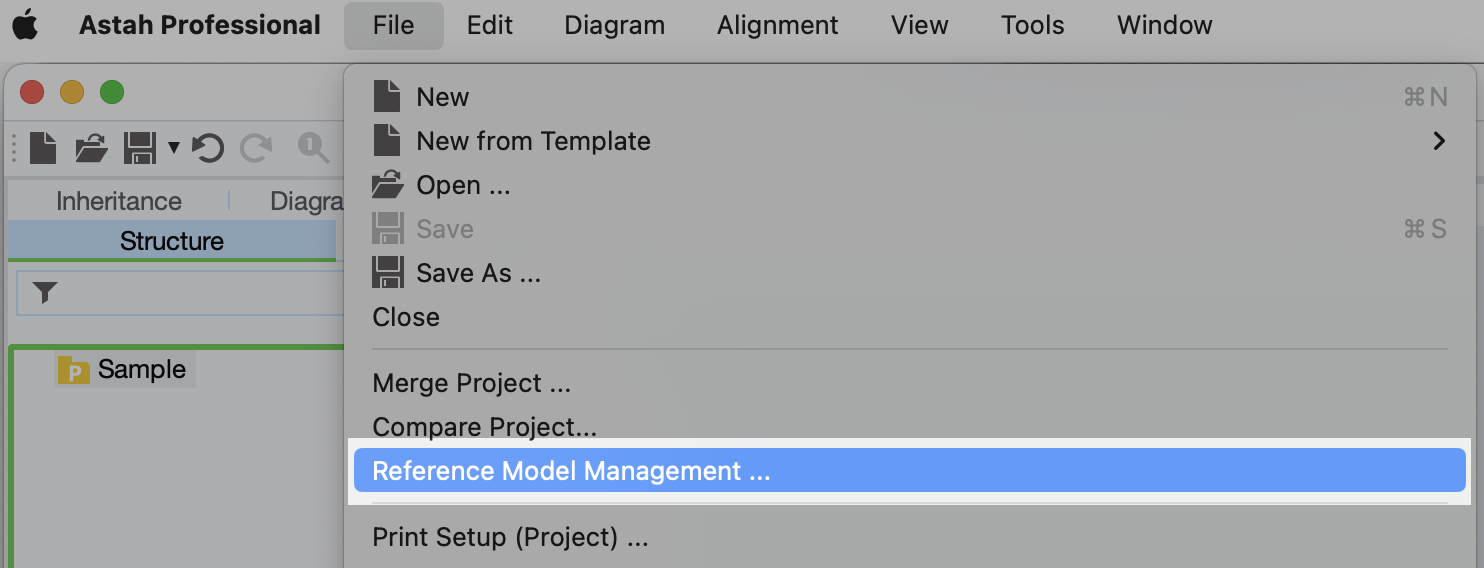
How to use this template: Import from [Reference Model Management] menu.
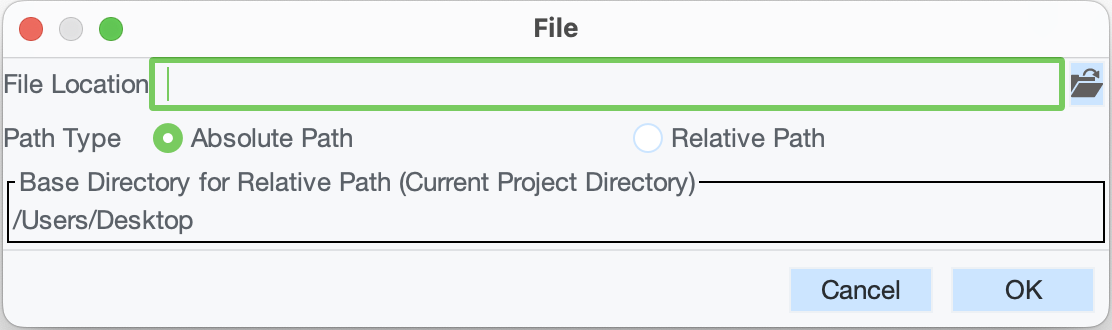
- Create a new file, go to [File] – [Reference Model Management]
- [Reference Model Management] window opens. Click [Add].
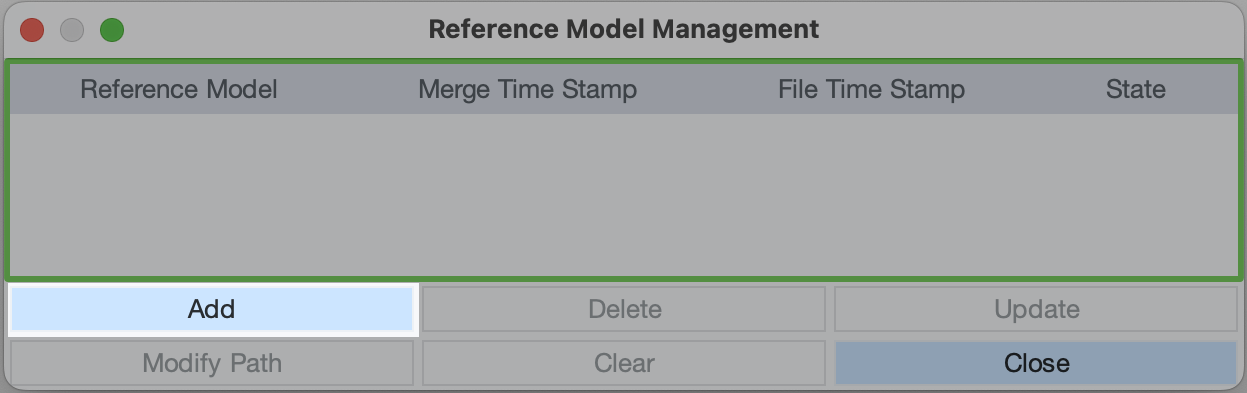
- A file chooser opens, select the shared Template file.
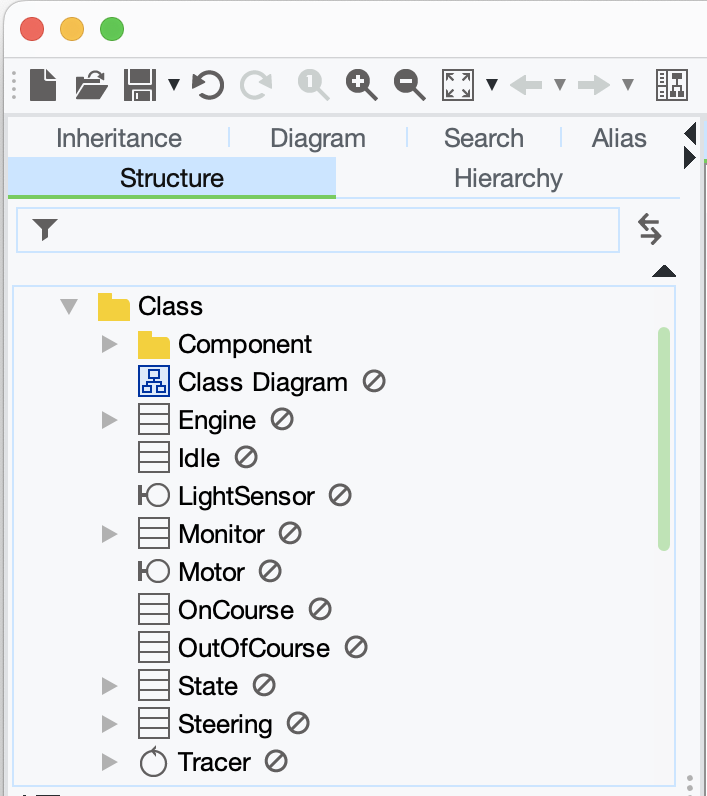
- All the models exist in the Template will be imported as read-only. And the template models will have symbols on the right in the structure tree view indicating that they are “read-only”. So obviously you cannot edit them but you can drag them from the tree and drop them directly on diagrams to represent them.
When this shared template file is updated, each member will be notified and asked to update it to the latest.
Learn More:
C: Copy and Paste
If your team members don’t need the whole template models and want to use some of them occasionally, just “copy and paste” would be sufficient.
Case: You want your team members to use the template models partially.
How to share template: Simply distribute this template .asta file to them. Then each member can use it anytime they need it.
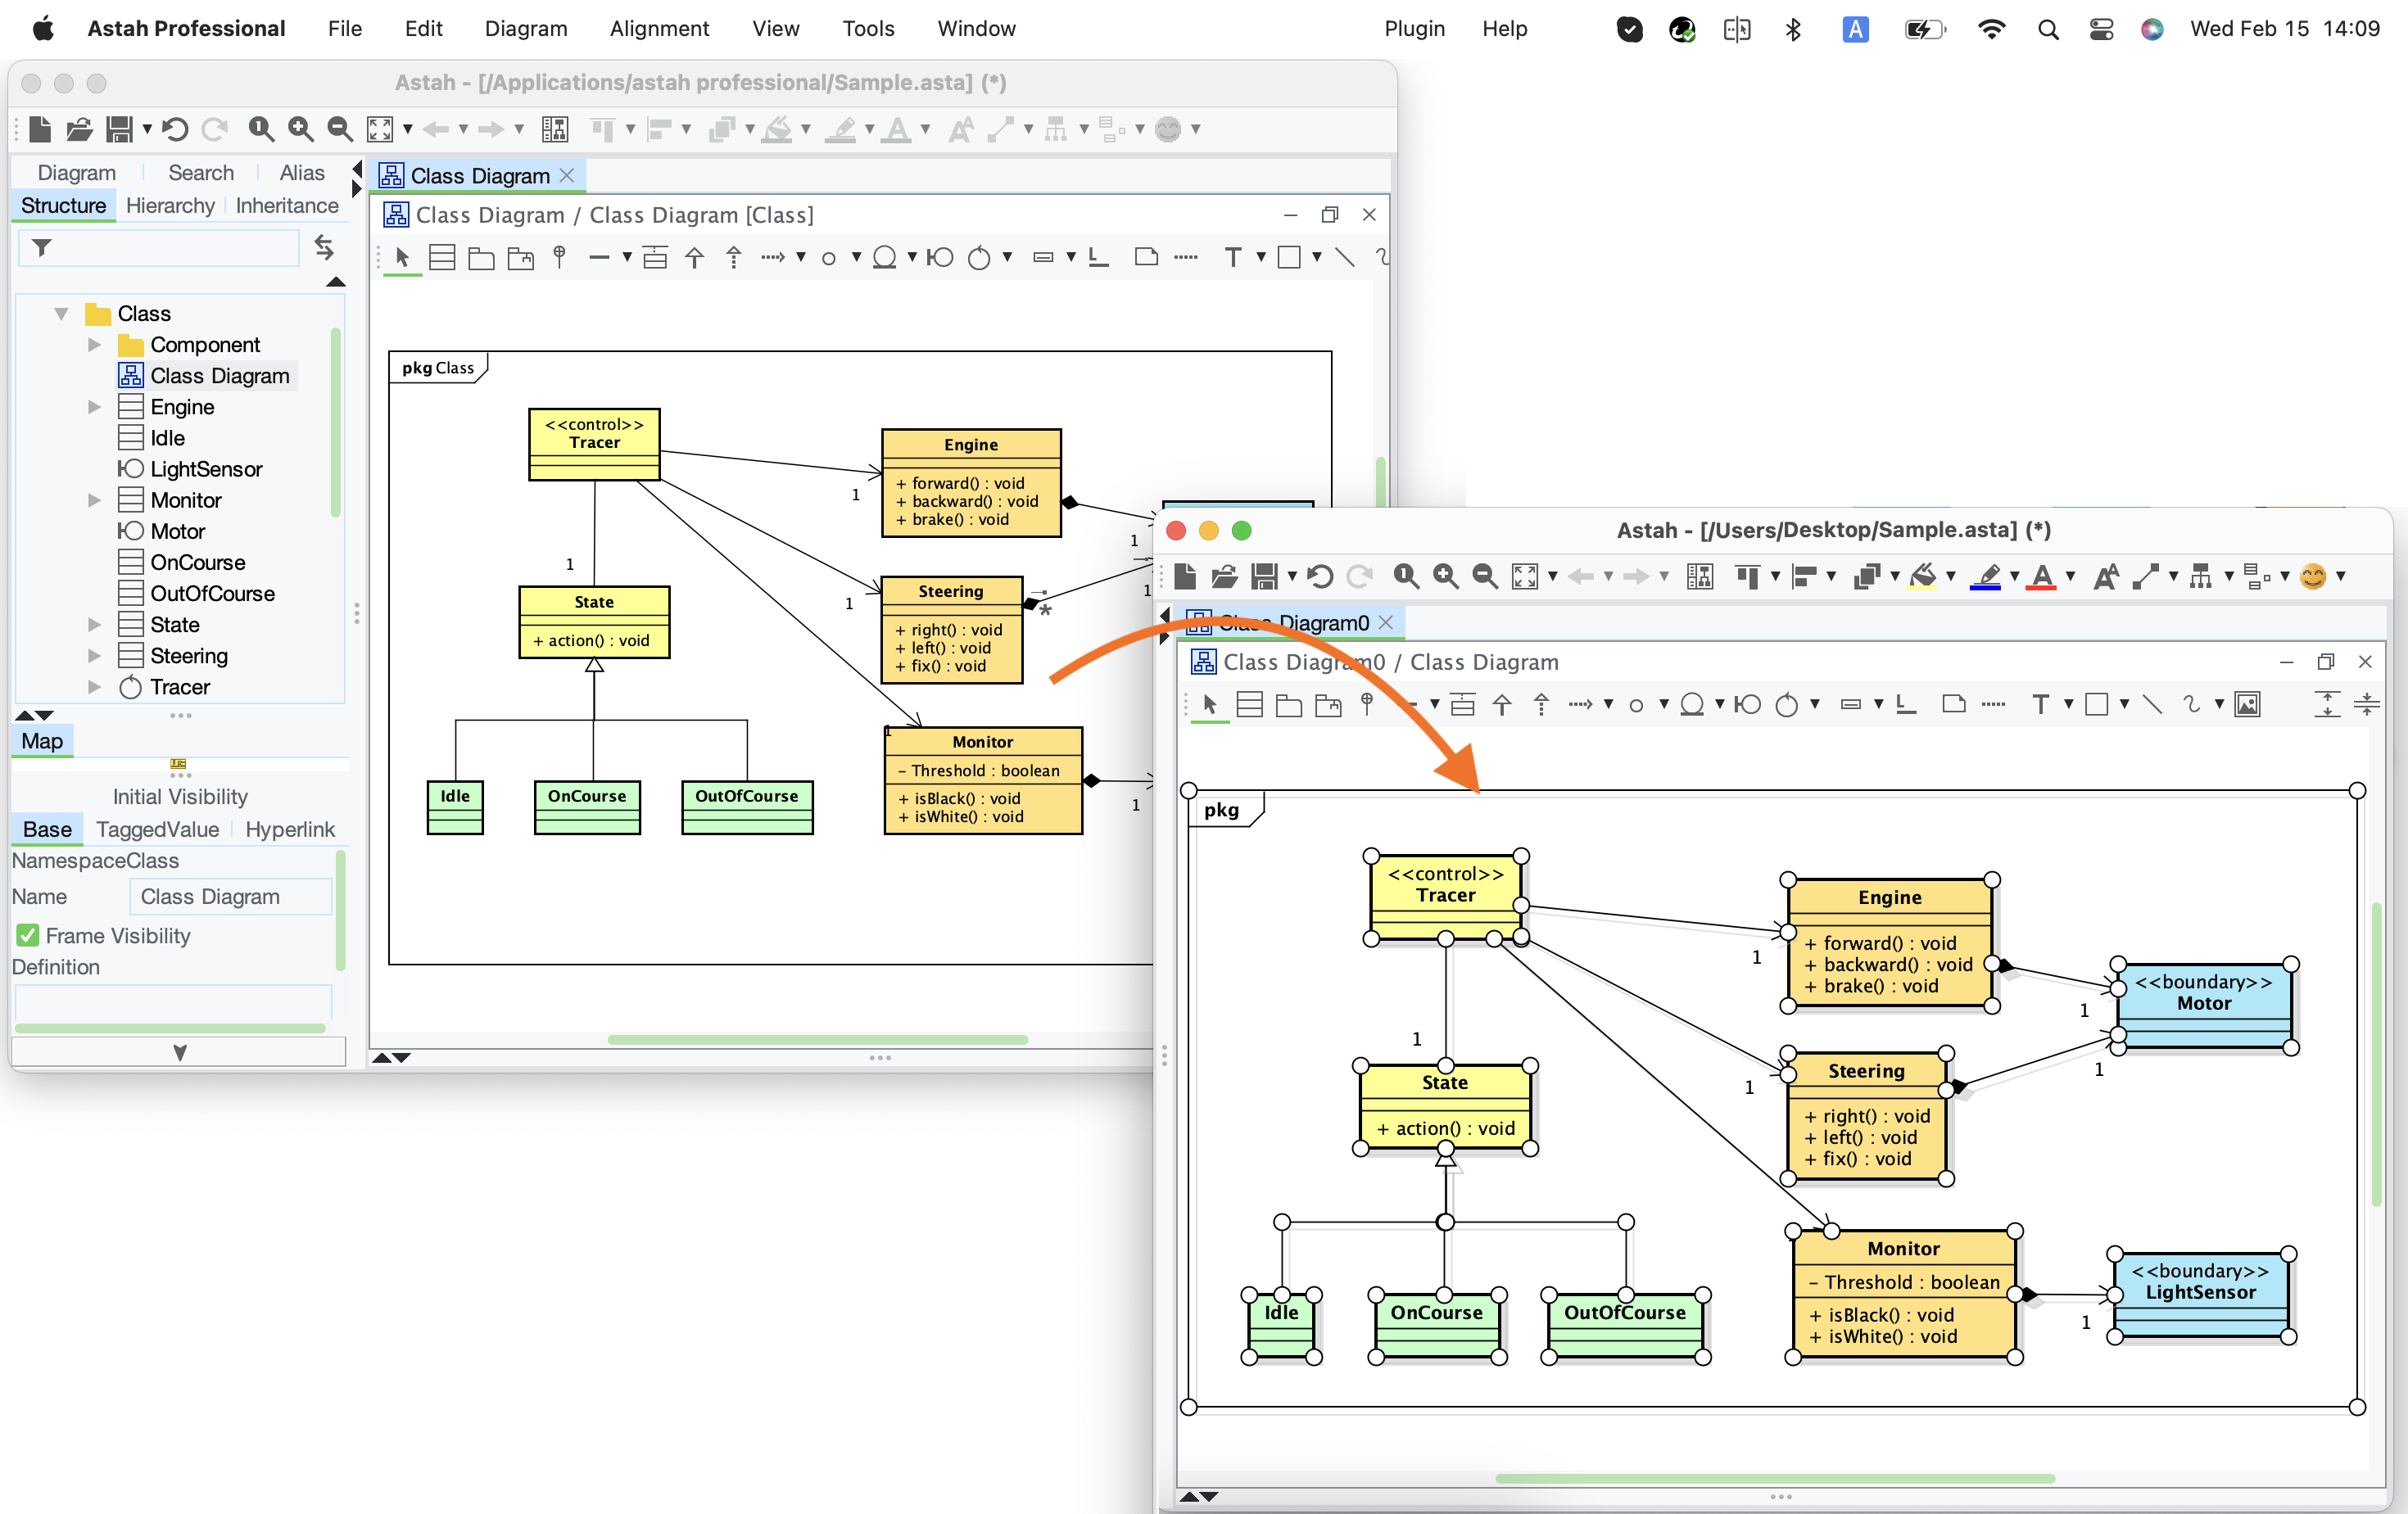
How to use template: Run two Astah instances. Open the template file in one Astah and open a file you want to work on in another. Then simply copy and paste models from template file to another when necessary.
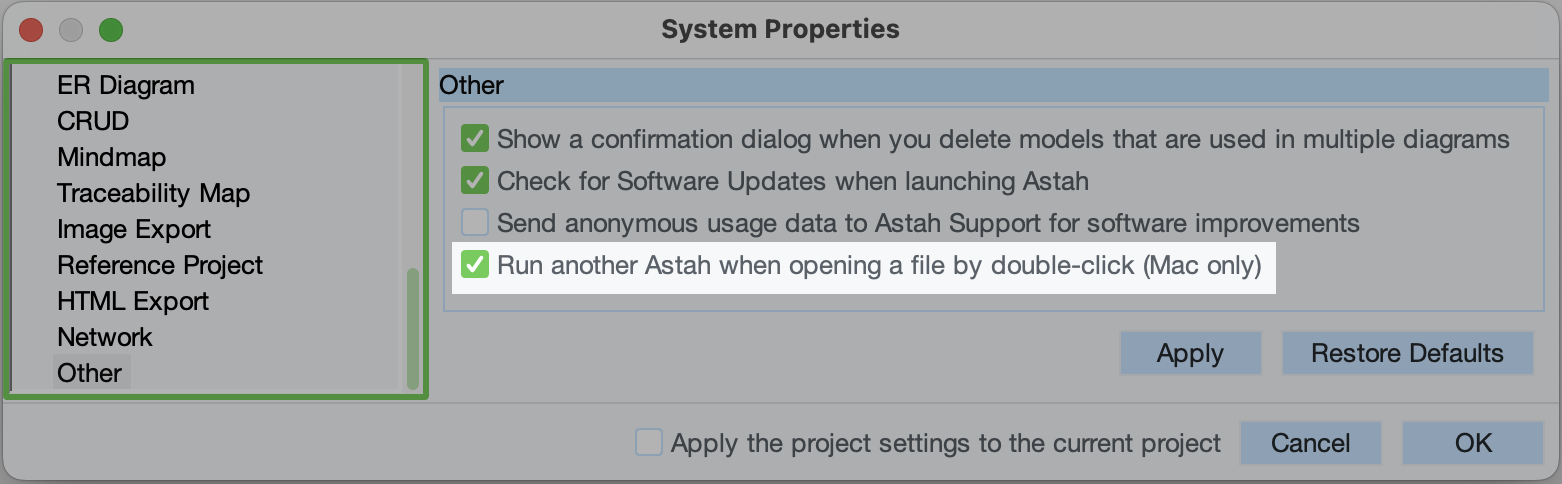
Mac users need to check the following option to allow two Astah instances to launch:
- Go to [Tools] – [System Properties] – [Other].
- Tick [Run another Astah when opening a file by double-click (Mac only)] and click [OK].
Hope this article helps.
Please leave a comment below if you have any questions!
Satomi Joba
Customer Success at Astah
PS: Most functionalities I have shown in this article are available in Astah Professional only.
